Enabling BitLocker in Windows 7
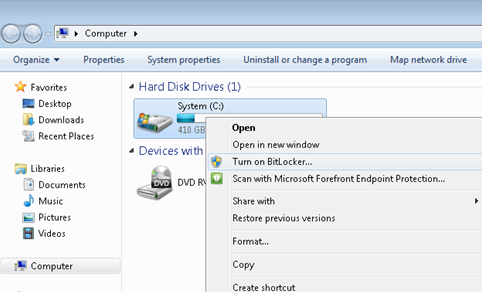
This guide describes how to BitLocker a PC. BitLocker is required to secure data on a PC’s local hard drive.Step 1 – Open Windows Explorer, right click on the C: drive, and select ‘Turn on BitLocker…’
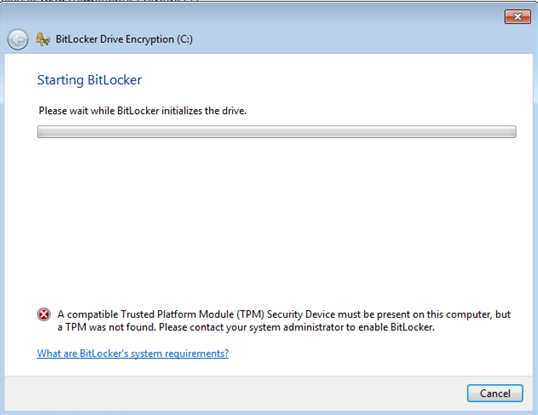
Step 2 – If you receive the below error message go to Step 3, if not, continue to Step 4.
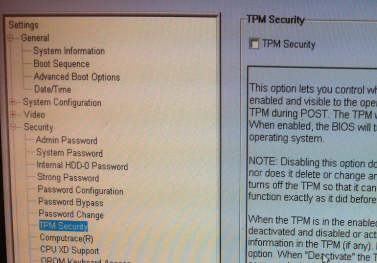
Step 3 – Check your computer's BIOS configuration and ensure that it supports 'TPM Security’ and that it is enabled. Below is a Dell BIOS configuration screenshot.
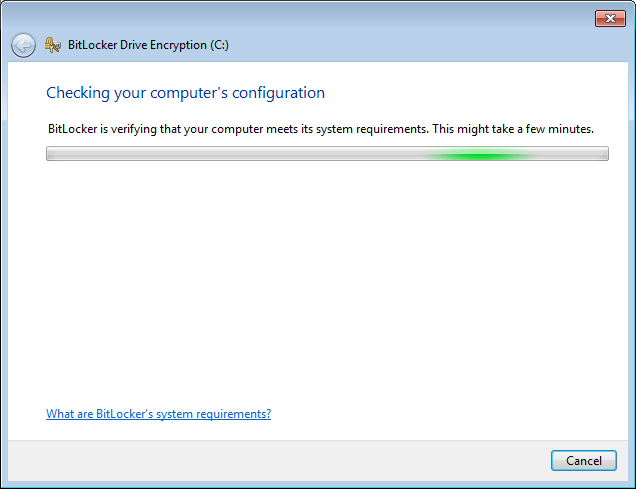
Step 4 – You will be presented with the below window and will need to wait for a couple of minutes.
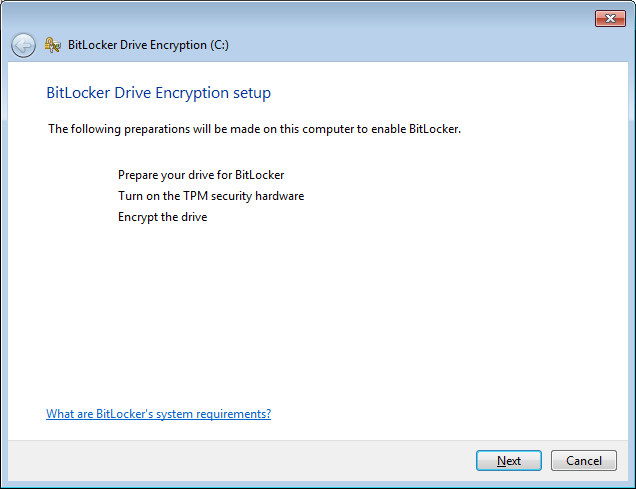
Step 5 – Click ‘Next’.
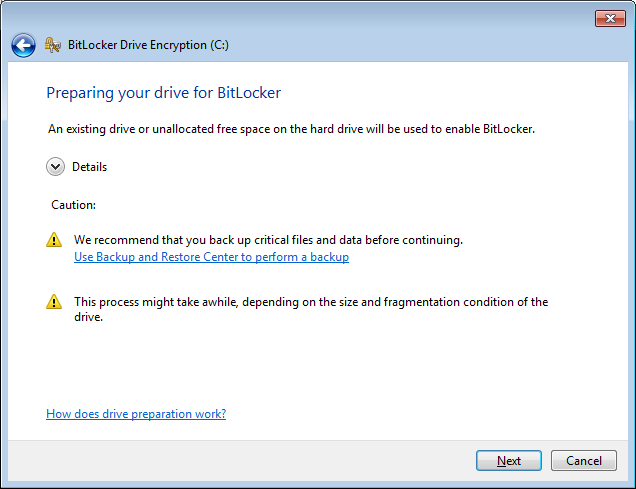
Step 6 – Click ‘Next’.
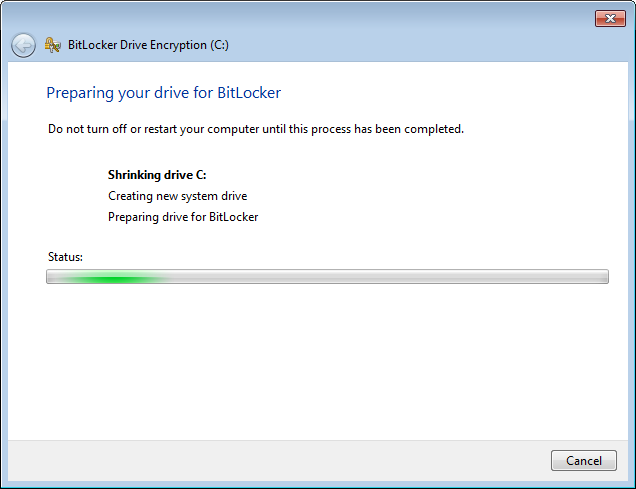
Step 7 – You will be required to wait for a short period of time.
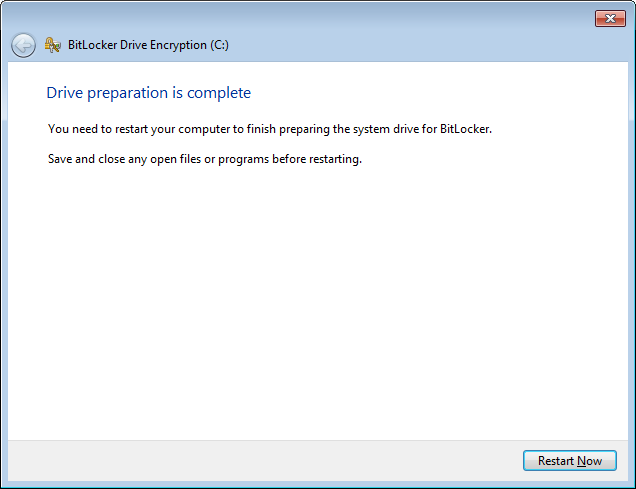
Step 8 – Click ‘Restart Now’.
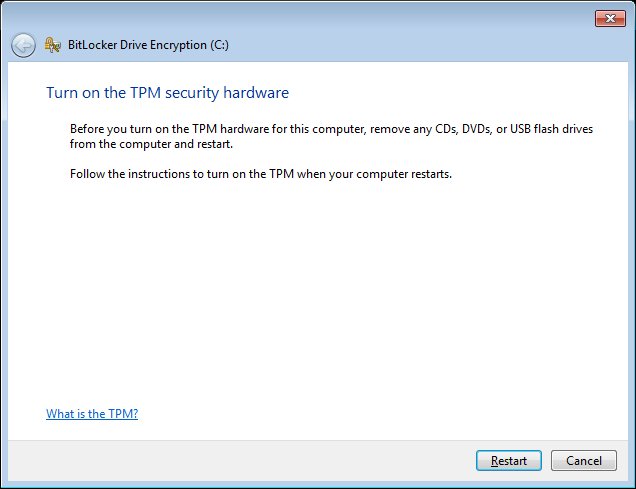
Step 9 – After you log in you will be presented with the below screen. Click ‘Next’.

Step 10 – Click ‘Restart’.
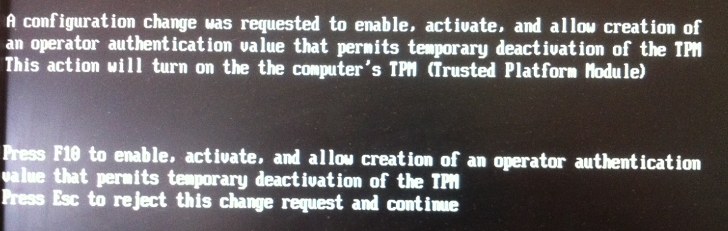
Step 11 – Before Windows loads you may be presented with a screen similar to the below. Ensure that you turn on TPM. Windows will then load.
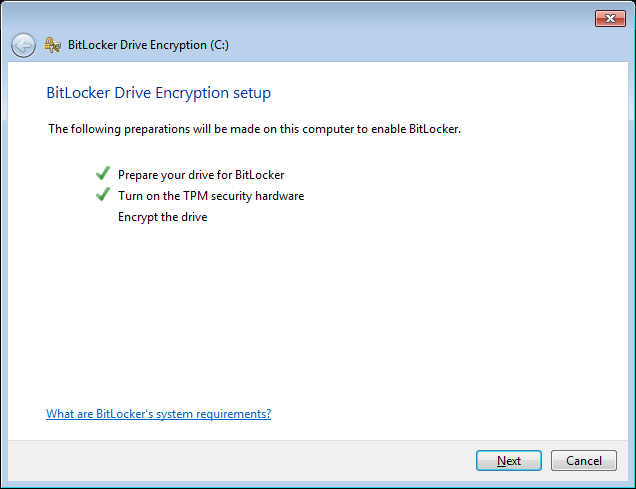
Step 12 – After you log in as an administrator you will be presented with the below screen. Click ‘Next’.
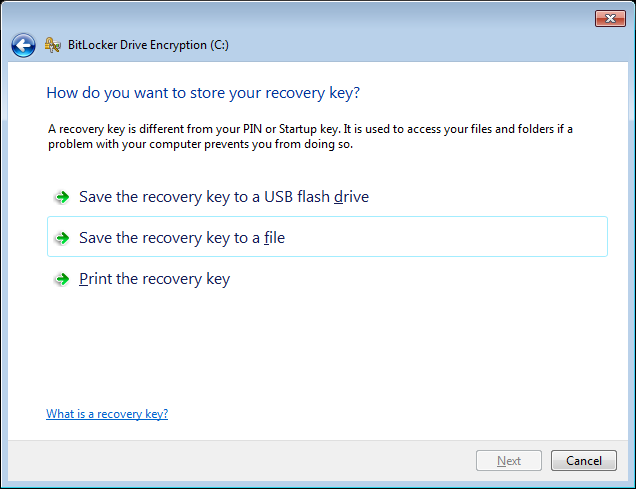
Step 13 – Select ‘Save the recovery key to a file’ and click ‘Next’.
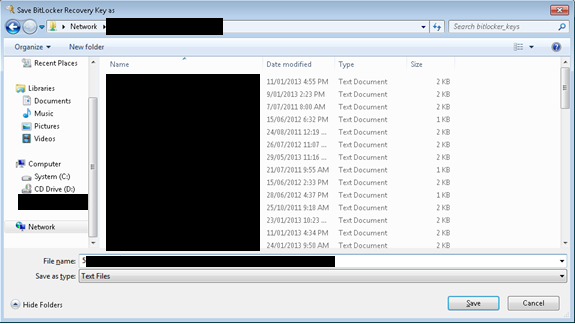
Step 14 – Save the required key in the desired location. Note, the key should be saved either on a network or external drive, not on the local hard drive.
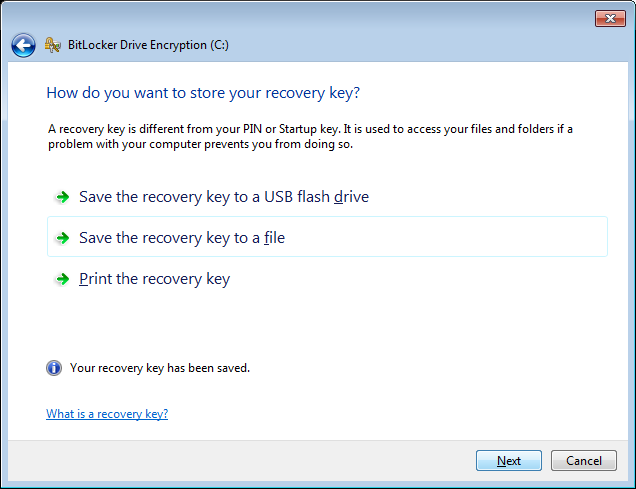
Step 15 – Click ‘Next’.
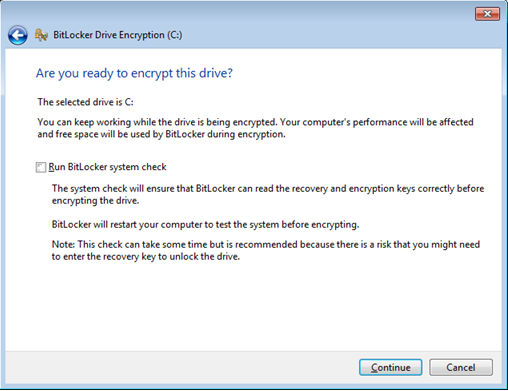
Step 16 – Click ‘Continue’.
Step 17 – BitLocker drive encryption will begin. This process may take several hours to complete.
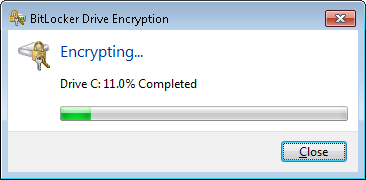
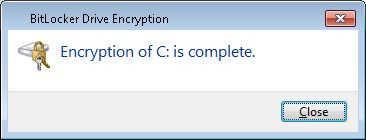
Step 18 – The drive is now encrypted. Click ‘Close’.