Microsoft Exchange 2003 Guide
Exchange Server 2003 is a mail server program that comes bundled with Microsoft Windows 2003 Small Business Server. It requires DNS and DC services to function. Exchange, DNS and DC services can all be installed on the one server. Exchange 2003 can be easily managed through Active Directory Users and Computers. Outlook Web Access (OWA) is a great feature in Exchange 2003 that allows users to securely access their email over the Internet using a web browser. There are also mobile apps such as Office Mail on the iPhone that connect to OWA.Install Certification Services
To use Outlook Web Access your mail server will need a certificate. To create a certificate you will need to install the Certification Services Windows component. Go to Control Panel > Add or Remove Programs > Add/Remove Windows Components. Tick Certification Services and ensure that both components are selected. Follow the prompts to install the components.
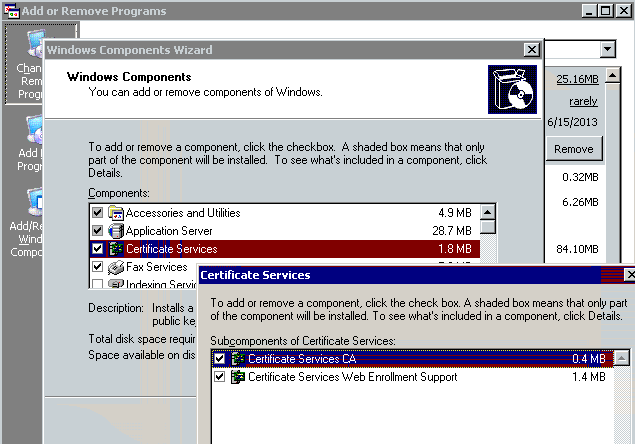
When prompted to select what type of CA to use, choose Enterprise root CA.

Configuring Outlook Web Access using ISS Manager
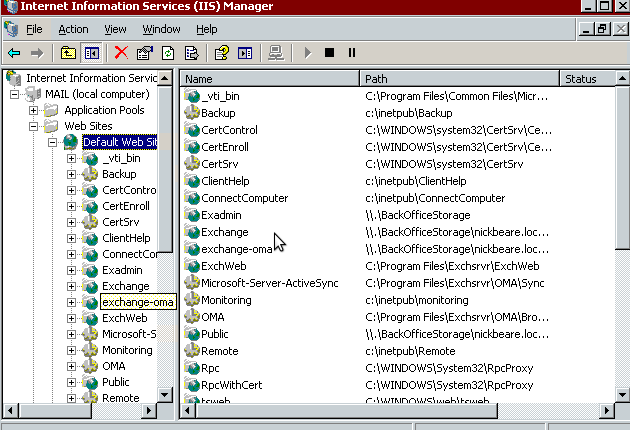
Outlook Web Access (OWA) allows users to securely access their email through a web browser over the Internet using SSL (HTTPS) on port 443. OWA has a webpage managed through IIS Manager. By default your OWA page is accessible via https://servername/exchange. To configure OWA go to Administrative Tools > Internet Information Services (IIS) Manager. Expand Server Name > Web Sites. Right click on Default Website and select properties.
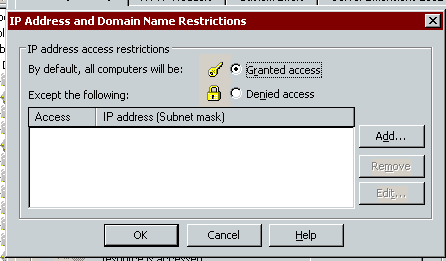
Select the Directory Security tab. Under 'IP address and domain name restrictions' click Edit.
To allow any user to access your OWA website via the Internet, tick the Granted Access radio button.
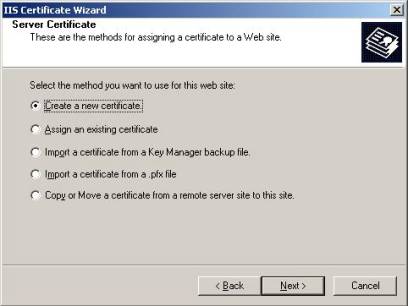
Creating a Certificate
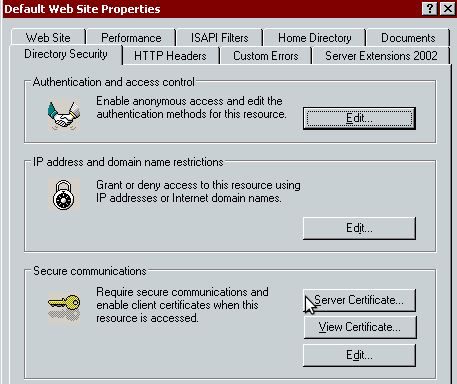
Within ISS Manager right click on Default Website and select properties. Select the Directory Security tab and click Server Certificate. Follow the prompts to create a new certificate. You will be asked to enter your FQDN and to create a name/location for your certificate.
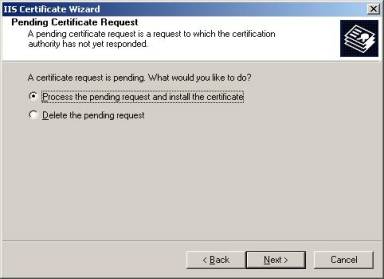
Appending the Certificate to your OWA Website
Within ISS Manager right click on Default Website and select properties. Select the Directory Security tab and click Secure Communications. Tick the 'Process the pending request and install the certificate' and then follow the prompts. You will notice that the SSL port is set to 443 by default.
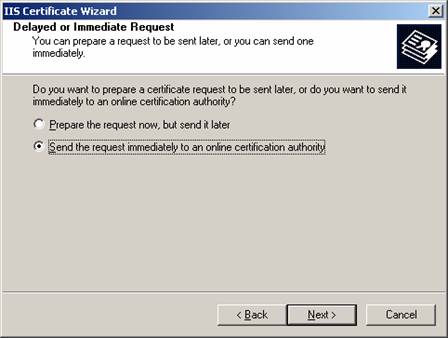
Because we’re configuring an online enterprise authority, select the 'Send the request immediately to an online certificate authority' option from the Delayed or Immediate Request screen
Enabling SSL on the OWA Website
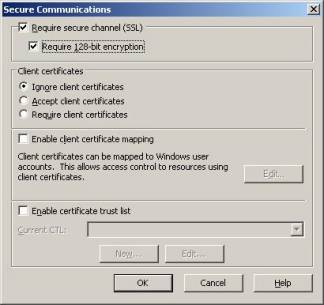
To encrypt the data transmitted between the clients and the mail server, open ISS Manager right click on Default Website and select properties. Select the Directory Security tab and click the Edit button under Secure Communications. Put a checkmark in Require Secure Channel (SSL) and Require 128-bit encryption as per below:
Exporting a Certificate
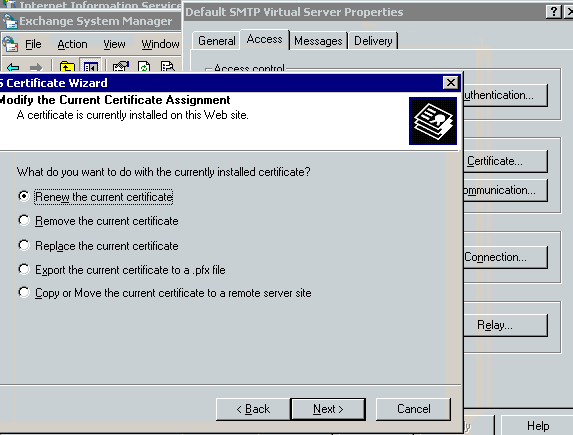
You can export your certificate by selecting the Server Certificate button in ISS Manager or the Certificate button for your SMTP protocol in System Manager. Once the Wizard begins, pictured below, select the 'Export the current certificate to a .pfx file' radio button.
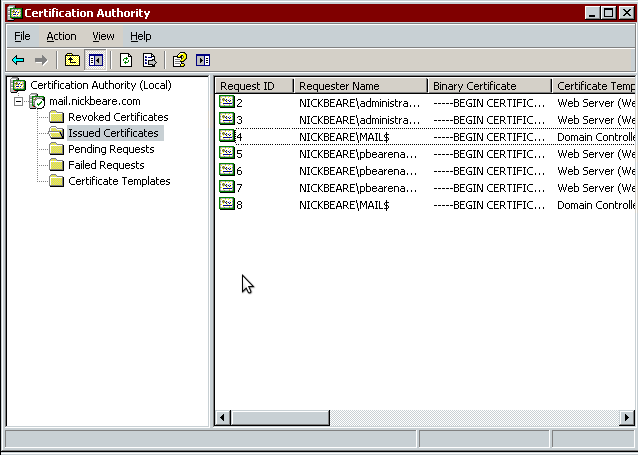
You can import certificates (.pfx files) by accessing Administrative Tools > Certification Authority.
Configuring SMTP
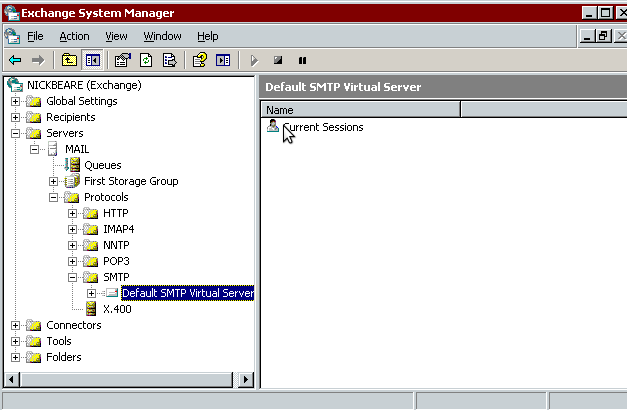
SMTP is a key part of any mail server. It is responsible for the transmission of email over port 25. To configure SMTP open the System Manager located under Start Menu > All Programs > Microsoft Exchange. Within System manager, Expand Servers > Your Server Name > Protocols > SMTP. Right click on Default SMTP Virtual Server and select properties.
Click the Access tab and select Certificate. Follow the prompts to use your existing certificate that you configured earlier for OWA.
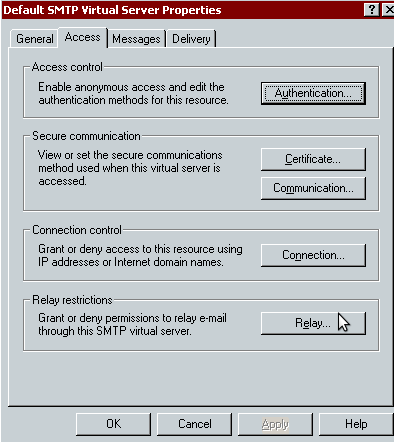
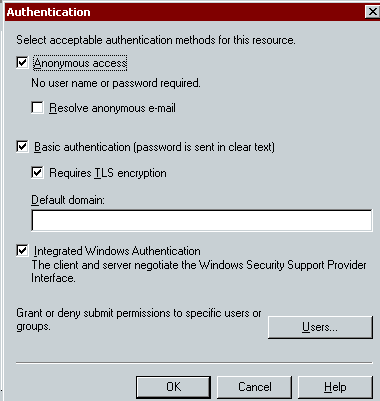
Within the Access tab select Authentication. Tick the Requires TLS Encryption checkbox. This setting encrypts authentication (very important!).
Create an SMTP Connector
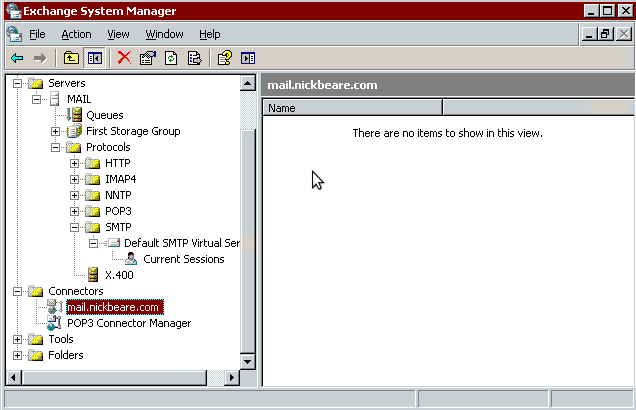
The next step is to create an SMTP Connector. This will allow your Exchange Server to route mail for another domain. In my case this is useful because it allows me to receive email for the domain nickbeare.com, even though my Exchange Server is not part of this domain. Go to System Manager, right click on Connectors and select New > SMTP Connector.
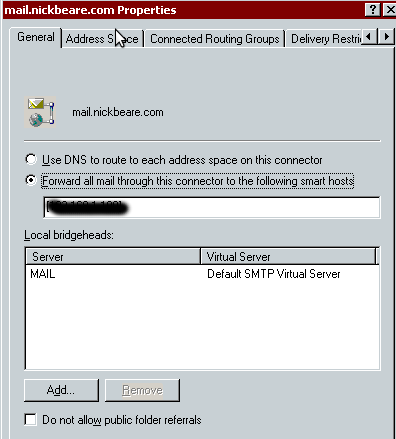
In the general tab tick 'Forward all mail through this connector to the following smart hosts' and enter the IP address of your mail server in square brackets. Under Local bridgeheads click Add and select your mail server.
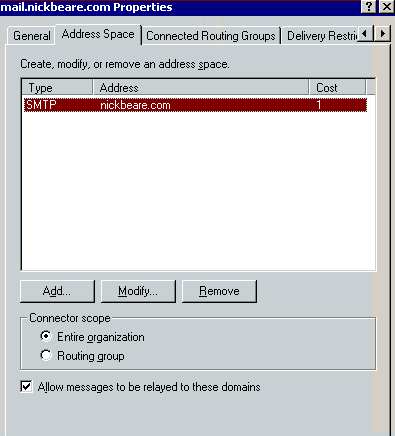
In the Address Space tab click Add, select SMTP, and enter the domain name you would like to forward mail for. Ensure that the 'Allow messages to be routed to these domains' is ticked.
How to disable SSL2 and PCT1
SSL2 and PCT1 are unsecure protocols with known vulnerabilities. It's much better to use SSL3. To switch them off type the following at the command line.
REG ADD "HKLM\System\CurrentControlSet\Control\SecurityProviders\SChannel\Protocols\PCT 1.0\Server" /v Enabled /t REG_DWORD /d 0 /f
REG ADD "HKLM\System\CurrentControlSet\Control\SecurityProviders\SChannel\Protocols\SSL 2.0\Server" /v Enabled /t REG_DWORD /d 0 /f
You can test to see what SSL protocols your server supports by visiting Serversniff.net
Once you have run the above commands, type iisreset to reset IIS. Next, enter your details at the above website. You should see no available SSL2 ciphers for your server. This indicates that SSL2 has been turned off. Check the SSL3 section to ensure that it is running.
How to view Windows uptime
systeminfo | findstr Time:
Outlook Web Access premium mode
Outlook Web Access on Exchange Server 2003 forces browsers other than Internet Explorer to use light mode rather than premium mode, which just means that many of the features and options beyond simple sending and receiving email are disabled or invisible to anyone running a different browser (such as Firefox, Chrome, or anyone on a shiny new Mac).
Free MX EMail Server Backup Service
junkemailfilter.com offer a free MX backup service. If your email server goes down and you don't have a backup mail server, incoming email can't be delivered. In the event that your mail server goes offline, the MX backup service will store email for up to 4 days Once your server comes back online this free MX backup service detects your server and transfers the stored email to your server. It may take several hours for the mail to reach your server.
IMPORTANT: this service is not compatible with SPF. To avoid blocking stored emails, make sure you remove your SPF record prior to bringing your mail server back online. You can confirm that your SPF record is removed by visiting SPF Query Tool. Make sure you reapply your SPF record once you have received your mail (wait 24 hrs).
To utilise this free service, add the MX backup records below for your domain. Make sure the backup MX records have a higher priority than your mail server's MX record. This will ensure that all incoming mail, attempts to reach your mail server first. If you mail server is offline, the incoming mail will direct to the MX backup servers and will be stored there until your mail server comes back online.
mail.yourdomain.com 10
mxbackup1.junkemailfilter.com 20
mxbackup2.junkemailfilter.com 30
Sender Policy Framework (SPF)
Sender Policy Framework (SPF) is an email validation system designed to prevent email spam by detecting email spoofing, a common vulnerability, by verifying sender IP addresses. SPF allows administrators to specify which hosts are allowed to send mail from a given domain by creating a specific SPF record (or TXT record) in the Domain Name System (DNS). Mail exchangers use the DNS to check that mail from a given domain is being sent by a host sanctioned by that domain's administrators.
Reference: Wikipedia
The below SPF rule validates an email only if it comes from the IP address associated with that server.
v=spf1 a -all